How to create a custom Apex Action for Salesforce Flows
Flows are quickly becoming the defacto automation tool in Salesforce. Their ease of use and visual interface for creating them enable admins and developers to create complex and powerful business processes declartively without any code! But there are instances where trying to do everything in a flow becomes visually overwhelming or there isn’t an out-of-the-box flow element that can meet your needs. This is where creating your own custom Apex action can help.
What is it?
Apex actions are both simple and complex. They are simple in that an Apex actions allow you to execute an Apex method from a flow. They are complex in that not just any Apex method can be called. Only invocable methods (methods annotated with @InvocableMethod) can be called. Only certain things can be passed into and return from an invocable method. Invocable methods are executed differently than a regular Apex method. But fear not, I hope to unravel some of these complexities in this article and get you confident in leveraging a custom Apex action to solve your business needs.
You can learn more about how flows can execute Apex actions in Salesforce Help Docs and more about Apex Actions in the Actions Developer Guide
Code Example
Below is an Apex class with an invocable method that will process “requests” from a flow and return “results” back to it.
public class CustomGreetingAction {
    public class Request {
        @InvocableVariable(label='Exclamation' description='The `Hello` in Hello World!' required=true)
        public string exclamation;

        @InvocableVariable(label='Name' description='The `World` in Hello World!')
        public string name;

        @InvocableVariable(label='Punctuation' description='The `!` in Hello World!' required=true)
        public string punctuation;
    }

    public class Result {
        @InvocableVariable(label='Greeting' description='The generated greeting.')
        public string greeting;

        @InvocableVariable(label='Error Message' description='The error message generated.')
        public string errorMessage;
    }

    @InvocableMethod(label='Custom Greeting' description='A custom action that generates a greeting based on the inputs.' category='Custom')
    public static List<CustomGreetingAction.Result> processRequests(List<CustomGreetingAction.Request> requests) {
        List<CustomGreetingAction.Result> results = new List<CustomGreetingAction.Result>();

        for (CustomGreetingAction.Request request : requests) {
            Result result = processRequest(request);

            results.add(result);
        }

        return results;
    }

    private static CustomGreetingAction.Result processRequest(CustomGreetingAction.Request request) {
        Result result = new Result();
        string exclamation = request.exclamation;
        string name = request.name;
        string punctuation = request.punctuation;

        try {
            result.greeting = generateGreeting(exclamation, name, punctuation);
        } catch (Exception ex) {
            result.errorMessage = ex.getMessage();
        }

        return result;
    }

    private static string generateGreeting(string exclamation, string name, string punctuation) {
        string greeting = exclamation;

        if (name != null) {
            greeting += ' '+name;
        }

        greeting += punctuation;

        return greeting;
    }
}
Code Review
Lets review the important parts of the code above!
Outer Class Naming Convention
I like to suffix my class names with Action. It makes it easier to identify which classes are for custom Apex Actions in my IDE and Salesforce Org.
Request and Result Inner Classes
You don’t have to define invocable methods with user-defined types, but I like to set them up that way. This allows invocable methods to accept and return multiple values. I also like to simply name them Request and Result so that they read better throughout the code (e.g. GenerateGreetingAction.Request and GenerateGreetingAction.Result).
@InvocableVariable Annotation
In order to use the Request and Result classes with the invocable method, they need at least one property annotated with @InvocableVariable. This also exposes them in Flow Builder when configuring the custom Apex Action. This allows you to pass data in and out of the custom Apex action. The following modifiers are available for this annotation:
label- A pretty name for the variable which is displayed in the Flow Builderdescription- A brief description to remember what the variable is forrequired- Identifies if the input variable is required (ignored by output variables)
You can learn more about the @InvocableVariable annotation in the Apex Developer Guide.
@InvocableMethod Annotation
In order to use the processRequests method as a custom Apex Action, it needs to be annotated with @InvocableMethod. This will expose it in Flow Builder when adding an Action element to the canvas. The following modifiers are available for this annotation:
label- A pretty name for the custom Apex action which is displayed in the Flow Builderdescription- A brief description to remember what the custom Apex action is forcategory- Organizes the custom Apex action underneath this in Flow BuilderconfigurationEditor- A Lightning Web Component (LWC) to use as a custom property editor. TODO: link to future post
You can learn more about the @InvocableMethod annotation in the Apex Developer Guide.
processRequests and processRequest Methods
I like to follow this pattern when writing my custom Apex actions. It keeps them clean and consistent and I can leverage the label modifier on the @InvocableAction annotation for the distinct and prettier name.
The processRequests method is the main entry point into the action. It defines the input and output from the action using it’s input parameters (e.g. List<CustomGreetingAction.Request> requests) and return type (e.g. List<CustomGreetingAction.Result>). The method itself loops through the requests passing them to the processRequest method. It captures the result and adds it to the results variable which is then returned from the method.
This is an area that tripped me up when I first started using custom Apex Actions. The TL;DR is every “request” needs to have a “result”. Let me explain further.
Salesforce executes your custom Apex action in batches. This is why the input parameter and return type are List. If Salesforce passes your action 3 “requests” it is expecting 3 “results”. This behavior affects how you handle errors and return data from your action. If an error in the second “request” caused the method to return early or you return your data too soon, Salesforce will throw an error (TODO find example of error). Following this pattern helps me avoid these issues.
The processRequest method is where you write your logic to handle the request and return a result. In our example we’re calling a private method name generateGreeting to populate our result with. Following this pattern gives you a good separation of concerns between wiring up the logic to process requests into results and the actual business logic you want to apply to the request. Instead of calling generateGreeting you could call a method from another class allowing you to reuse the business logic across your code base.
Demo
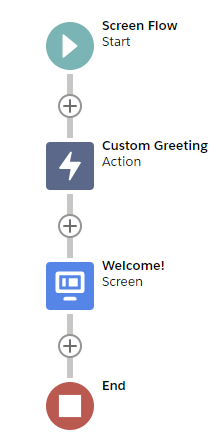
Alright, lets take our custom Apex action for a test drive. I’m going to create a Screen Flow that looks like this:
When I add an Action element to my flow, I click on the Custom category and click on the Action input to see a list of available Actions: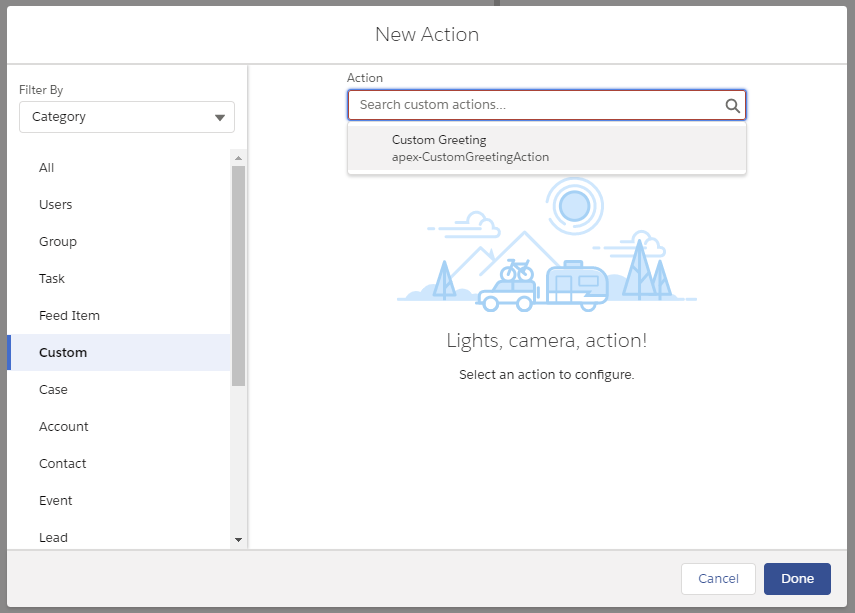
There’s our custom Apex action! You can see that the dropdown displays the label modifier from the @InvocableMethod annotation and the Apex class name with the apex- prefix. When we click on the Action from the list, the Standard Property editor is displayed: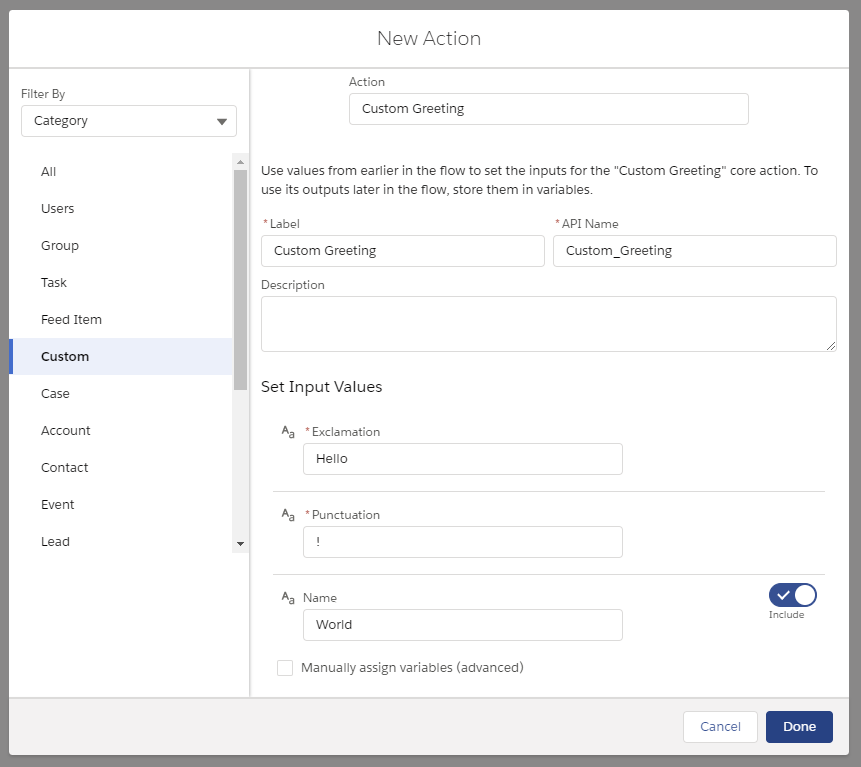
I entered Custom Greeting for the Label and Salesforce generated the API Name for me. Underneath Set Input Values, you can see the inputs for the three @InvocableVariable annotations we made in the Request class. It displays each annotation using the Label modifier from the annotation. Exclamation and Punctuation come first because they are required and I had to click on Inlcude to enter “World” in for Name.
OK, lets add a Screen element to our flow to display our greeting. Edit the screen flow to look like the following:
I added a Display Text component and named it “Greeting”. We’ll use this component to display our greeting. Click on the Insert a resource… input to show the list of available resources in the flow: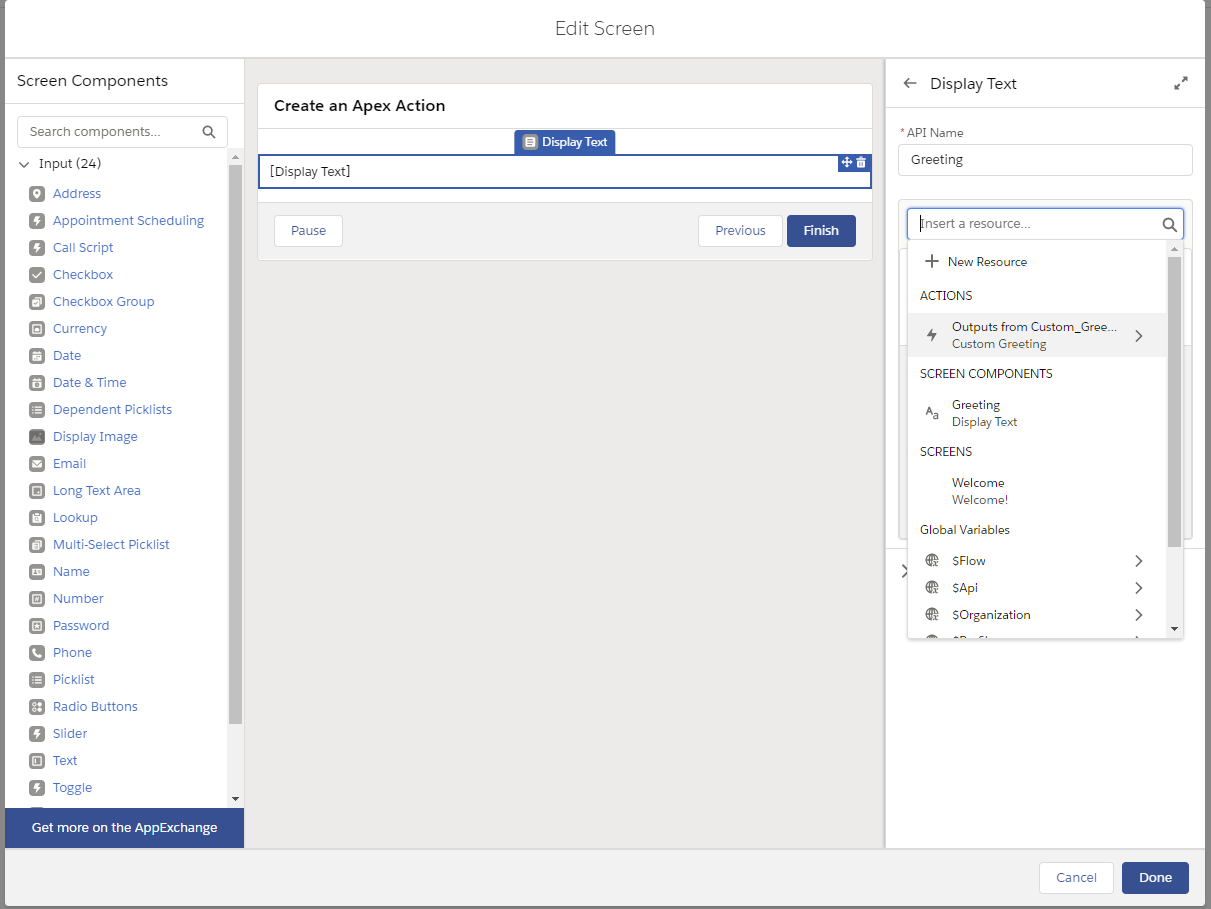
Underneath the ACTIONS heading in the dropdown click on the Outputs from Custom Greeting option. This will display the available outputs from our action: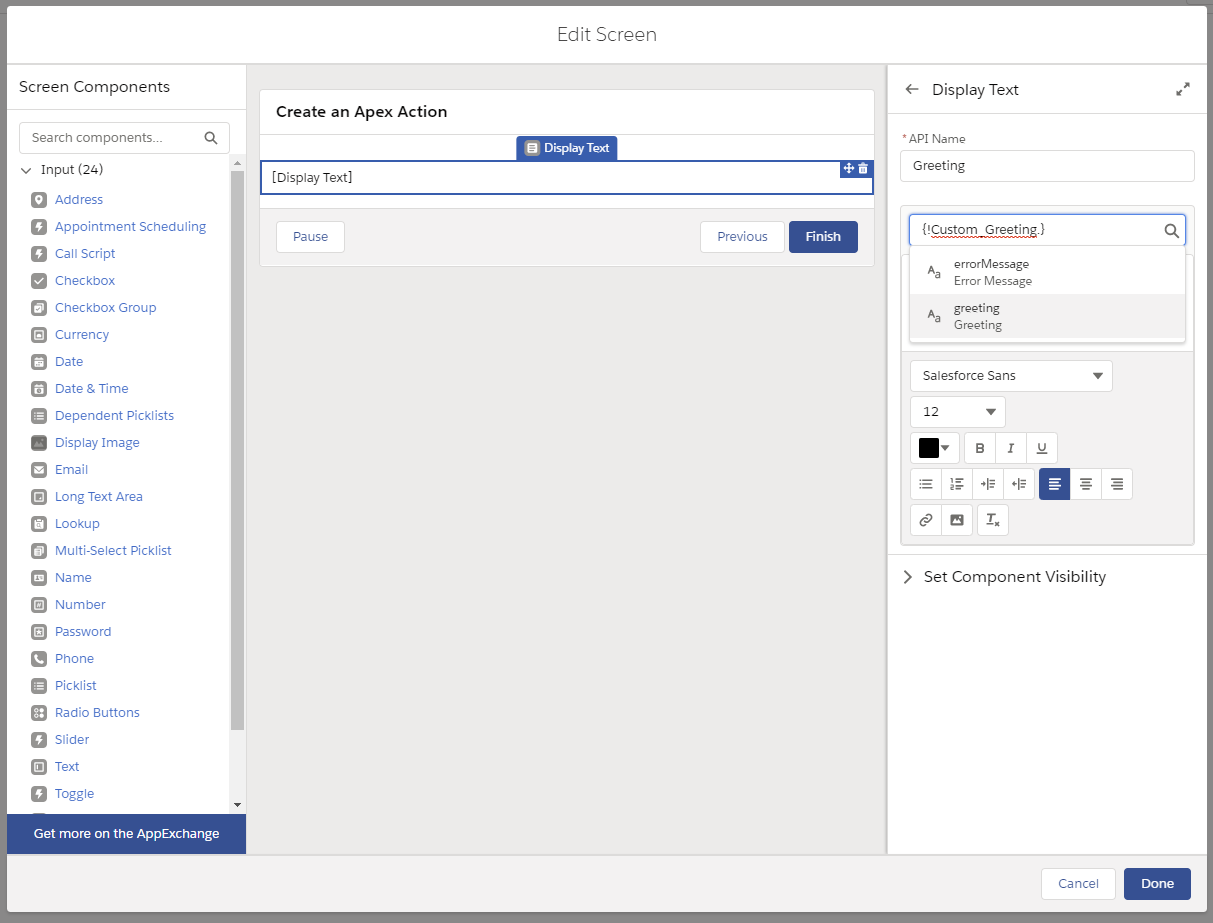
You can see the outputs for the two @InvocableVariable annotations we made in the Result class. It displays the variable name and Label modifier for each annotation. Click on the greeting option to insert it into the rich-text editor: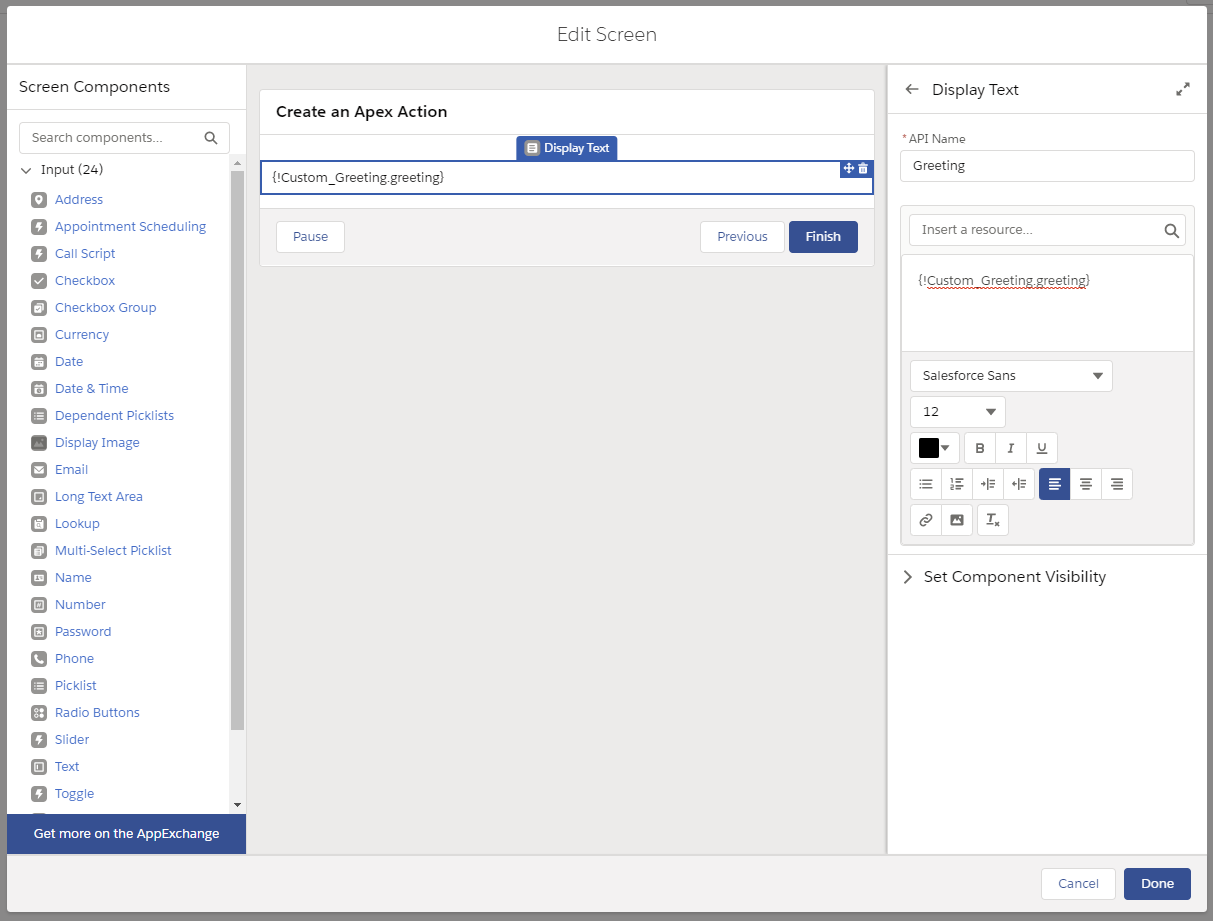
You can see it inserted a token that references the greeting output variable from the Custom_Greeting Action element. This will display the value of that variable in the Display Text component.
Alright, save your flow with the default options and click on Debug in the header. Accept the defaults in the Debug the flow dialog and click Run. You can see that Hello World! is rendered on the screen:
and you can see the details for our custom Apex action in the Debug Details: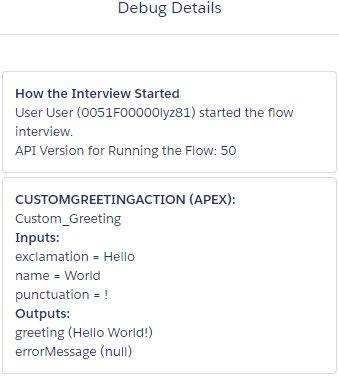
The Debug Details show the Apex class name (CUSTOMGREETINGACTION), the API Name of the Action element (Custom_Greeting), and the Inputs and Outputs for the action.
Final Thoughts
I hope this simple example of how to create an Apex action helped you understand how to create your own custom Apex action to extend a flow to meet your specific needs.